
How to Create an Email Distribution List (Gmail, Outlook, Yahoo)
Are you tired of manually adding a perpetual number of email addresses to the “To:” list of your outreach or marketing emails?
Well, I definitely remember those days, although I try to forget them. Luckily, I discovered the power of email distribution lists, and managing group emails was no longer a problem for me.
This guide will teach you what these lists are and how to create them.
What Is an Email Distribution List?
An email distribution list is a group of contacts you can use to send an email to the people in the group without having to manually type all of their email addresses into your “To:” field.
For instance, imagine that you are an influencer marketing specialist that works with key opinion leaders from different social media platforms. To make your contact list organized, you create lists named “YouTube KOLs,” “Instagram KOLs,” or “TikTok KOLs,” where you would include the influencers with channels in corresponding social media sites.
If you had to send a message to all of your partner YouTubers, all you would have to do is compose your message and enter “YouTube KOls” as the recipient of your email.
Thanks to their ability to group contacts and manage mass emails, distribution lists are useful tools for digital marketers. Apart from the use case for influencer marketers that we mentioned above, here are a couple of other ways you can use email distribution lists.
Grouping Event Participants
If you are organizing in-person and online events such as webinars, workshops, or product launches as part of your marketing efforts, then you can gather the email addresses of all the attendees, store them in a distribution list with the name of that event, and use the list for your follow-up email marketing campaigns.
Communicating with Loyalty Program Members
If your company has set up a customer loyalty program for your clients, you can use the email distribution lists to group the loyalty program members and send them exclusive offers or messages relevant to their participation in the program.
Support for High-Value Customers
It is quite common for companies to provide personalized support services for their biggest and most important customers. Here too, a distribution list will come in handy as you can create a list of your VIP customers and send them customer support-related content such as server uptime status updates and security notices.
Lightweight Email Marketing
If your product and company are relatively small and you cannot afford full-size CMS and email outreach tools yet, you can use your email account to manage your email marketing campaigns.
In this case, you can group your email contacts into distribution lists based on the campaign you are running or the buyer’s persona description. For example, if you market a design tool, your lists could be “digital marketers seeking design tools” and “product designers.”
Affiliate Marketing
This experience is the type I have had with email distribution lists. I was running an affiliate program for one of my products, and we could not afford to buy a specialized affiliate marketing tool. So, instead, I would communicate with my affiliates over email.
During that time, I collaborated with several hundred affiliate marketers on several campaigns. You can imagine just how little time it took for my inbox to become a mess. I had to organize my communications somehow, and that’s where distribution lists came in handy.
I created distribution lists based on the specific campaign and added all of the affiliates participating in that campaign. This method allowed me to easily send campaign-related content to the relevant affiliates.
We talked a bit about the common use cases of email distribution lists for digital marketers. Now, let’s discuss the benefits you can get from using this feature.
Why Is an Email Distribution List Useful?
Email distribution lists are a great tool for digital marketers who want to improve their email marketing KPIs by leveraging audience segmentation without using full-scale email marketing tools.
Here are some of the benefits that you can get by using this feature in your email client.
Save Time
Can you imagine just how tedious it would be to manually enter the email addresses of dozens or even hundreds of people you want to reach out to?
Thanks to email distribution lists, adding an extensive list of email addresses will take you as much time as adding a single email address.
Avoid Mistakes
Apart from wasting your time, manually adding a large number of emails into the “To:” section of your message also increases the chances of making a mistake and accidentally including the wrong person or forgetting to add an email that was supposed to be in the list.
Increase ROI
Email is a highly effective channel for reaching your business and marketing goals. The KPIs of email marketing are quite impressive, with its ROI going as high as 4,300%.
To take advantage of a channel with such a high return, it is a great idea to add the emails of your target audience to your account, create distribution lists out of them, and start running your email marketing campaigns.
Create a Segmented Email Marketing Audience
One great benefit of creating email groups is the ability to create and manage segments of your potential users.
With distribution lists, you can create email segments based on your users’ geographic locations (e.g., “Users from the U.S.” or “South American Users”), behaviors (e.g., “Users who have converted to Pro”), or even their demographics (e.g., “Boomers” or “Gen Z”).
With these segments at your disposal, you can personalize your campaigns and create emails with different content based on the interests of these groups.
Different buyer personas will also be the most active at different times and days of the week, so you can also use segmentation to send your emails at the right time for each group.
Now that you know the benefits this feature provides, let’s distinguish email distribution lists from the other ways you can group contacts in email services.
What’s the Difference Between a Distribution List and a Shared Mailbox?
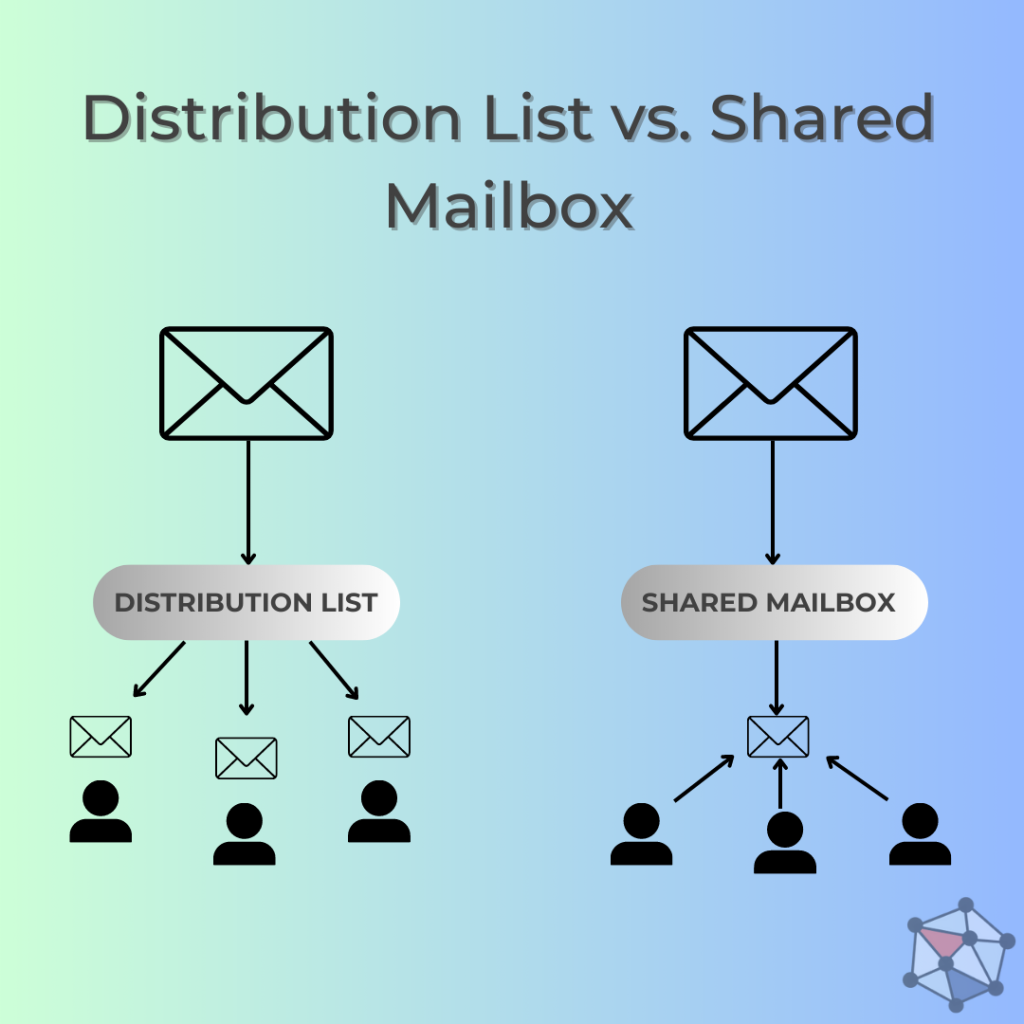
The main difference between a distribution list and a shared mailbox is that a distribution list is intended for one-way communication; recipients cannot reply to the message via the distribution list. A shared mailbox, on the other hand, allows two-way communication and allows the recipients to respond to the emails sent to the shared mailbox.
These two concepts look similar at first glance, as they both allow you to send a message to multiple recipients by typing only the group name in the “To:” field. However, the way they work and their uses differ significantly.
The Structure and Function of Distribution Lists and Shared Mailboxes
As the name implies, a shared mailbox is a single mailbox that multiple users can access.
Many people confuse shared mailboxes with sharing an email account’s login and password with multiple people to access and use that account called a shared inbox.
A shared inbox is not the same as a shared mailbox; apart from creating a communication breakdown by multiple users writing from the same account, using that method is also highly insecure, as sharing passwords is always a bad idea.
The shared mailbox, however, is a special feature available on most email services that allows admins to create a shared business email address, like sales@example.com. They will then give permissions to certain email accounts in their company, such as the sales reps, to access and use this email address.
So, if you send an email to the sales@example.com address, the message will appear in the inboxes of each sales rep this mailbox is shared with. The sales reps can also answer that email using their own email account.
To sum up, a shared mailbox is an actual email address that multiple users can use and manage (or set up an email parser to do it automatically). A distribution list, on the other hand, is simply a group of people that you can add to your “To:” section.
Unlike the shared mailbox, if the users were part of a distribution list and have received an email using it, they will not be able to reply to that email.
Here’s a visual example of what these structures look like:
Considering the difference in their structure and the way they handle both one-way and two-way communication, shared mailboxes and distribution groups are useful for very different situations. Let’s talk about them in greater detail.
Case #1: Email Newsletter
Imagine yourself in the position of a digital marketing specialist of a small professional blog specializing in project management. Apart from reading educational and informative content about the said profession, your website visitors also have the option to sign up for your newsletter and receive curated project management content right in their inboxes.
How would you send them these newsletters? In this case, opt for the email distribution list. Since your communication is mainly one-sided, and you do not expect your users to reply back to your emails, this solution is perfect.
Case #2: Nurturing Leads
Say you are part of a team focused on targeted B2B email marketing, and you are nurturing leads over email with the hope of converting them into paying customers.
In this case, it would be helpful to have a unified mail address like contact@example.com or marketing@example.com to place on your website’s “Contact Us” so your leads can write their inquiries to that address.
Moreover, you would also want all of your team members to be able to read the messages that the leads have written and answer them on behalf of the marketing team, meaning that you would have marketing@example.com in the “from:” field of the response that the lead would get.
Therefore, in this case, it is best to have a shared mailbox for your team.
Case #3: Customer Surveys
What if you did a survey to find out the interests of your target audience and wanted to send an email to ask your recipients to fill it out?
Again, there is no expectation for the recipients to respond to your email. You simply want them to click on the link and complete the survey.
Therefore, this case is another example of one-way communication where email distribution lists are the best solution.
Now that we have covered the nature and use cases of email distribution lists, it is time to learn how to make them.
How to Create an Email Distribution List in Gmail
Let’s begin with the instructions for creating a distribution list in the most popular (with around 1.8 billion users as of 2023) email service out there—Gmail.
Google manages all of its contacts and group management functionalities in its Contacts service.
Step #1: Select Contacts through Google Apps
You can find this service by clicking on the app drawer icon in the upper-right corner of your Gmail account screen.
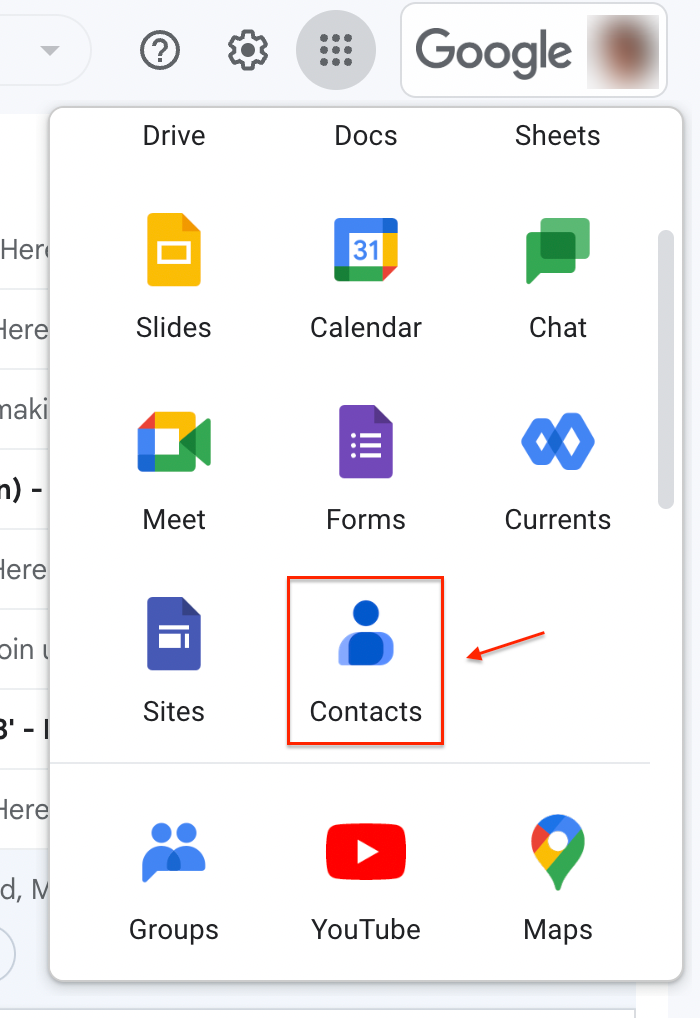
In the app drawer, you will see all the services you have available for your Google Workspace, including Contacts.
Now, let’s click on the contacts button to open that service.
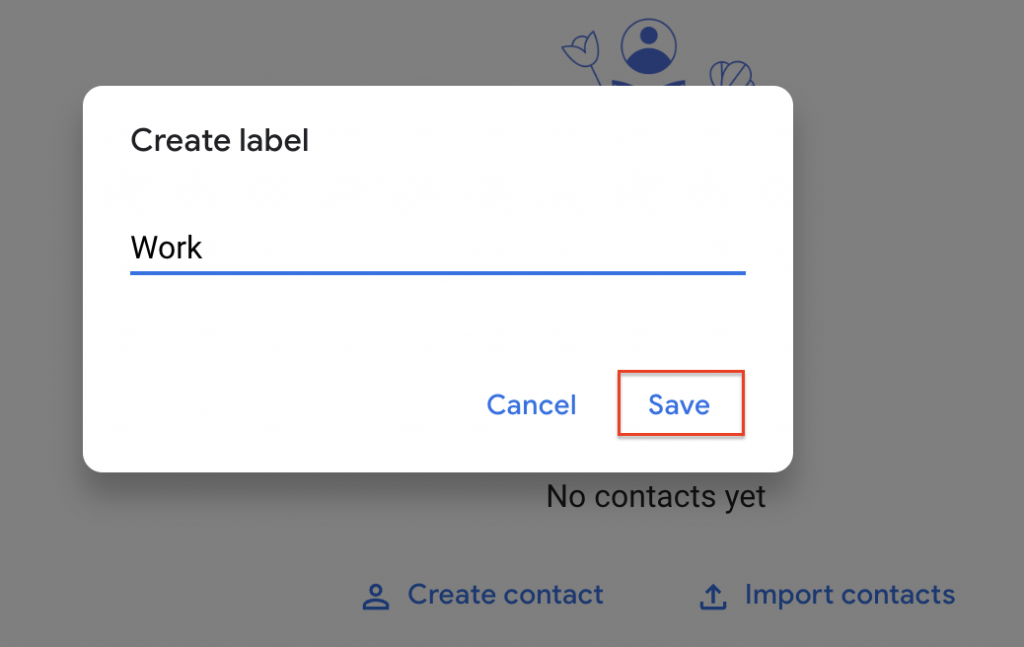
Step #2: Select Create label
The term the Contacts service uses for email distribution lists is “labels.” To create a label, find the “Create label” button on the left sidebar and click it.

Google Contacts will then ask you to name your new label. For demonstration purposes, we have used the name “Work,” but it can be anything you want depending on your use case (e.g., “Newsletter Subscribers” or “WWDC 23 Attendees”).
Let’s click on Save to finish the creation of the label.
That’s it, the label is ready! All you need to do is add contacts to that label.
Step #3: Add contact(s) to a certain label
The way you associate contacts with labels is quite straightforward in Google. All you need to do is select the contacts you want from your list and click on the label button on the toolbar above to assign a label to it.
That’s it, you have successfully created an email distribution list in Google Contacts.
Step #4: Choose label as email recipient
Now, let’s use our new list in an email message. We will need to type our label name in the “To:” field and select the group name that appears in the suggestion box.
Once you click on the group name, Google will populate your group of recipients with all the emails you have added to that group.
That’s all for Gmail; if you are using Gmail as a mail client, the UI is slightly different, but the steps are the same. Managing distribution lists was quite easy in Google, right?
It is actually easy to do in other popular email services, too, including Microsoft Outlook.
How to Create an Email Distribution List in Outlook
Just like Google, Microsoft’s email service also manages distribution lists, which they call “Contact Lists,” in its contacts app.
Step #1: Select “New contact list”
To create a contact group, open the contacts app of your Outlook account and click on the “New contact” button.
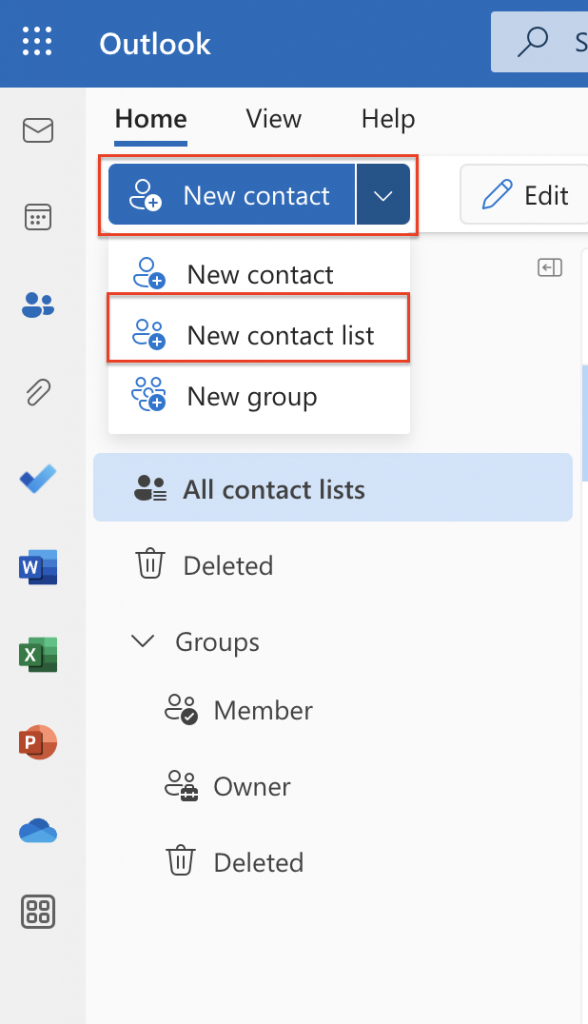
From the menu that opens, select “New contact list” and open the contact list editor.
Step #2: Name your list and add members
In the editor, you will be able to give your contact list a name and add email addresses to it.
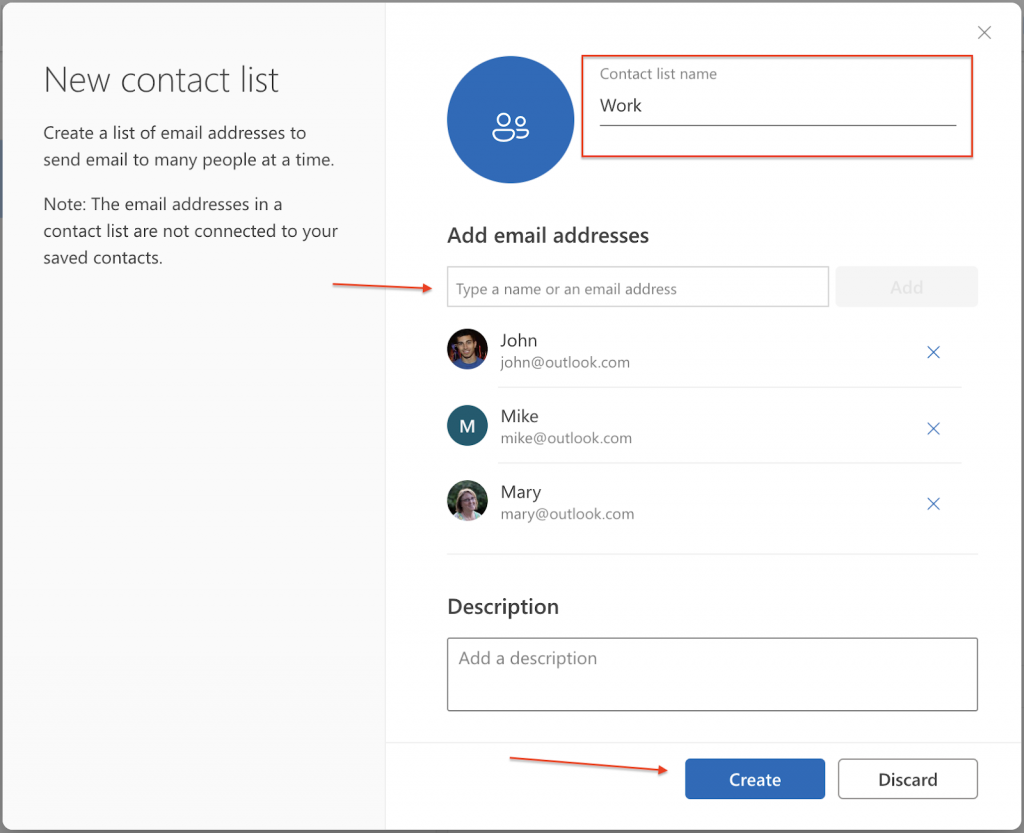
When you are done adding the contacts you need, click the “Create” button to finish adding the new contact group.
Step #3: Select “Send email”
Now, let’s try out our contact list. Click on the “Send email” button under the Outlook contact list title.
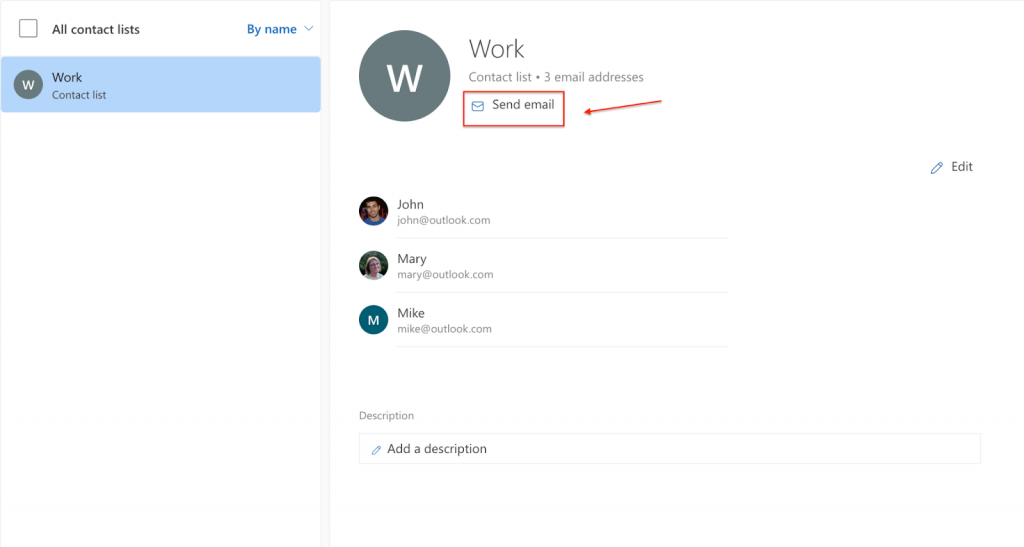
Outlook will create a draft email and add your contact list as a recipient.
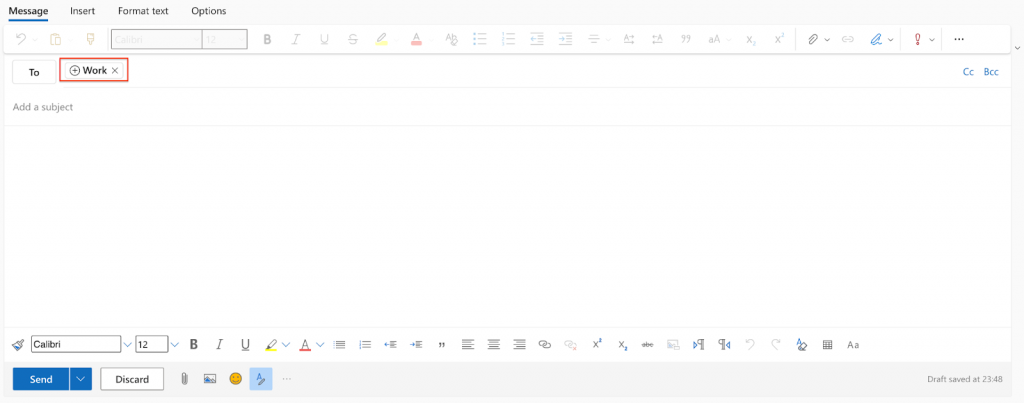
All you need to do is compose the email and hit send!
With the steps clear for Outlook distribution lists, let’s look at our last service in this list—Yahoo Mail.
How to Create an Email Distribution List in Yahoo Mail
In terms of how this feature works, Yahoo Mail is similar to the previous two; you will need to create a list of contacts.
Step #1: Create a new list
In Yahoo Mail, open the right sidebar and click on the “Contacts” tab to access your address book.
After that, open the “Lists” tab and locate the “Create list” button.
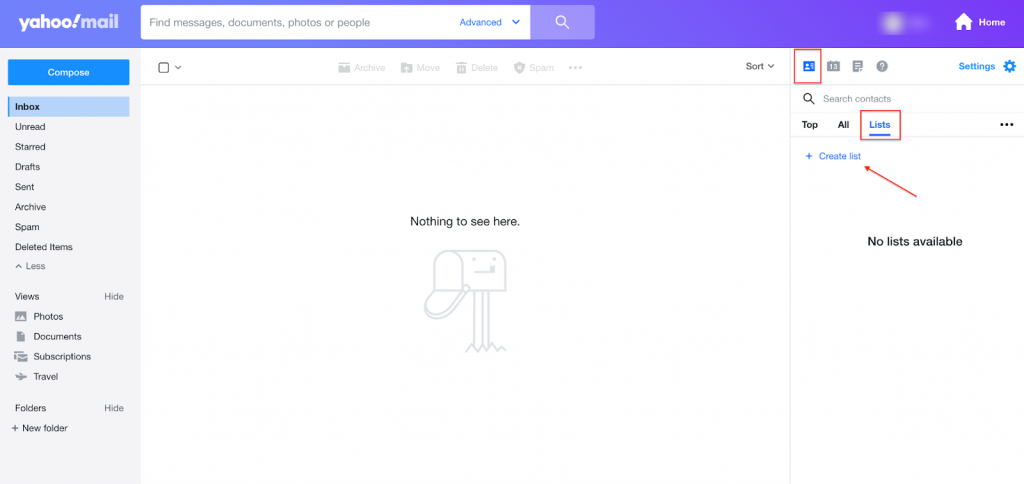
Clicking on this button will open the list creation screen on the sidebar.
Step #2: Name the list and add contacts
Type the name of our list and add the emails that we want to be part of it.
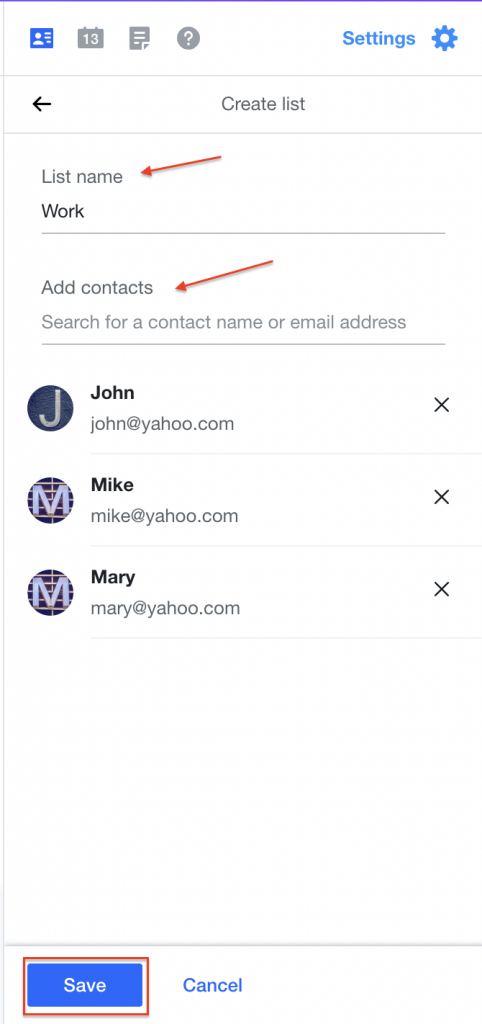
Afterward, click on save, and the distribution list is ready!
Step #3: Email your list
Finally, let’s create a new email and try adding our list to it. Like earlier, we will type the list name in the “To:” field and select our list from the dropdown.
That’s it; you have just populated your list of recipients with the members of the group.
Now Over to You
Email distribution lists are quite handy when you need lightweight email marketing without buying a dedicated tool. With their help, you handle your email marketing efforts in a more efficient way.
This guide was part of a series about email marketing. To check out the rest, you can visit our blog.

Sona Kalantaryan is a senior digital marketer with a creative past. Big fan of high cinema and well-optimized landing pages. She authors guides by sharing the best practices and does it the right way!