Mastering Remote Access: How To Monitor Your Raspberry Pi Behind A Firewall From Your Mac
Let's talk about something that's been bugging a lot of tech enthusiasts lately: accessing your Raspberry Pi remotely, especially when it's tucked away behind a firewall. Yep, you heard me right. You’ve got a Raspberry Pi sitting in your home network, perhaps running a cool project or acting as a media server, but you’re miles away and need to access it remotely. This scenario often leads to frustration, particularly when firewalls or complex router configurations stand in your way.
Remote access refers to the ability to connect to a device or network from a different location. In the context of this guide, it involves accessing a Raspberry Pi from a Mac, even when the Raspberry Pi is behind a firewall. This setup requires specific configurations to ensure secure and reliable connectivity. In this article, we will explore effective strategies on how to monitor your Raspberry Pi behind a firewall from your Mac, as well as discuss four interesting trends related to this topic. By the end of this guide, you'll have the knowledge and tools necessary to create a secure and efficient Raspberry Pi setup tailored to your needs.
Understanding the Challenge: Raspberry Pi and Firewalls
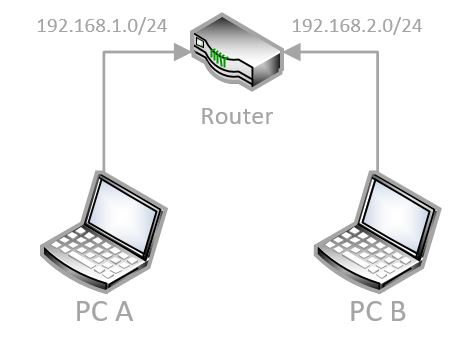
A firewall acts as a digital gatekeeper, controlling incoming and outgoing network traffic based on predefined security rules. While essential for protecting your home network from unauthorized access, it can inadvertently block legitimate attempts to connect to your Raspberry Pi from outside your local network. This is why direct connections often fail without proper configuration.
Many home routers already include basic firewall features, which is great for general security. However, using a Raspberry Pi as a dedicated firewall provides more customization options and control. It also allows pairing additional security tools that consumer routers may not support, offering a more robust defense layer for advanced users.
Core Strategies for Remote Monitoring
Overcoming the firewall challenge requires smart solutions. We'll explore two primary versions of approach: leveraging cloud-based services and establishing direct, secure connections using VPNs and remote desktop protocols.
Method 1: Leveraging Cloud-Based Remote Access (e.g., RemoteIoT)
One of the simplest ways to bypass the complexities of firewall configuration and dynamic IP addresses is to use a cloud-based remote access service. These services act as a bridge, allowing your Raspberry Pi to "call out" to a central server, which you can then access from anywhere. The "RemoteIoT" service is an example of such a platform.
How to Set Up RemoteIoT:
- Install the Service on Your Pi: Open the terminal of your Raspberry Pi (either directly or by accessing your Raspberry Pi with SSH on the local network) and install the remoteiot service. This typically involves running a few commands provided by the service provider.
- Access the Portal: Now, open the remoteiot portal in your browser on your Mac and login to the dashboard.
- Connect Your Pi: Once logged in, you should now see your Raspberry Pi in the list of account devices, ready for remote interaction.
This method simplifies the process significantly, as it often eliminates the need for complex port forwarding on your router. It's particularly appealing for newcomers as "this process can be slightly cumbersome for a newcomer, so we’ve compiled a..." simplified approach.
Method 2: Direct Connection via VPN and Remote Desktop Protocols
For those who prefer more control or wish to avoid third-party cloud services, a combination of Virtual Private Networks (VPNs) and remote desktop protocols offers a robust solution. This approach requires a bit more setup but provides a highly secure and flexible remote access environment.
The Power of a Virtual Private Network (VPN)
One popular method for monitoring a Raspberry Pi behind a firewall is to use a Virtual Private Network (VPN). A VPN creates a secure, encrypted tunnel between your Mac and your home network (or directly to your Raspberry Pi if it's acting as a VPN server). Once connected via VPN, your Mac essentially becomes part of your home network, allowing you to access your Raspberry Pi as if you were physically present in your home. This effectively bypasses the firewall's blocking of direct incoming connections.
Visual Monitoring with VNC
Once you've established a network connection (either directly on your local network or via VPN), you can use VNC (Virtual Network Computing) to get a graphical desktop interface of your Raspberry Pi on your Mac. This is incredibly useful for monitoring applications, browsing files, or performing tasks that require a visual interface.
Enabling VNC on Raspberry Pi:
- Boot Up and Navigate: Boot up your Raspberry Pi and click the Raspberry menu icon in the top-left corner.
- Access Configuration: Head to Preferences > Raspberry Pi Configuration.
- Enable VNC: In the Interface Options tab, enable VNC.
- Restart: Click OK and restart your Raspberry Pi when prompted.
After enabling VNC, you'll need a VNC client on your Mac (like RealVNC Viewer) to connect. Simply enter your Raspberry Pi's IP address (or hostname if configured) and the VNC password you set up.
Remote Desktop Protocol (RDP) with XRDP
Another excellent option for remote desktop access is XRDP, which implements Microsoft's Remote Desktop Protocol (RDP) for Linux systems. This allows you to use a standard RDP client on your Mac to connect to your Raspberry Pi, offering a seamless desktop experience.
XRDP Installation on Your IoT Device (e.g., Raspberry Pi):
- Install XRDP: Install xrdp on your IoT device (e.g., a Raspberry Pi running Linux) via the terminal. This is usually a simple command like `sudo apt install xrdp`.
- Connect from Mac: Use an RDP client such as Microsoft Remote Desktop (available on the Mac App Store) or Remmina (if using Linux on a virtual machine on your Mac) to connect.
If you're not using a VPN, you'll need to configure port forwarding on your router to direct RDP traffic (default port 3389) to the Raspberry Pi's IP address. This exposes the RDP port to the internet, so ensure strong passwords and consider changing the default RDP port for added security.
Ensuring Reliable Connectivity and Advanced Tips
Beyond the core methods, a few advanced tips can significantly improve the reliability and security of your remote Raspberry Pi setup.
Managing Dynamic IP Addresses with MAC Address
One common headache for remote access is when your Raspberry Pi's IP address changes, especially if it's on another network with a different router and ISP. "It worked great (remote shell) until i changed the ip address (ie put the pi on another network with a different router and isp)." This is where using a MAC address becomes invaluable.
A MAC address is a unique identifier assigned to your Raspberry Pi's network interface. By using the MAC address, you can ensure that your device is always reachable, even if its IP address changes. You can configure your router's DHCP server to always assign the same IP address to your Raspberry Pi based on its MAC address (DHCP reservation).
How to Find Your Raspberry Pi's MAC Address:
You can find your Raspberry Pi's MAC address by running the following command in the terminal:
ip link show eth0(Replace `eth0` with `wlan0` if you're using Wi-Fi.) Look for the "link/ether" entry.
Using Your Mac as a Monitor and Keyboard (Initial Setup)
Before you can even think about remote access, you might need to set up your Raspberry Pi initially. "Wondering how to use your mac laptop as a monitor and keyboard to program your raspberry pi remotely without having to hook up a monitor and keyboard to the..." This is often done via SSH (Secure Shell) for headless setup. You simply connect your Pi to your network, find its IP address (e.g., via your router's connected devices list), and then use the Terminal on your Mac to SSH into it:
ssh pi@<Raspberry_Pi_IP_Address>This allows you to perform all initial configurations, install software, and enable services like VNC or XRDP, all without needing a physical monitor or keyboard attached to the Pi.
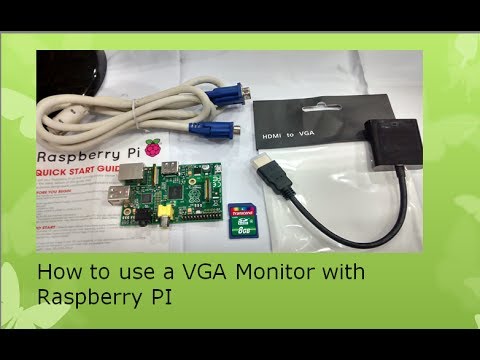
Physical Display Connections (for context, not remote)
While the focus of this guide is remote monitoring, it's worth noting the various ways to connect a physical display to your Raspberry Pi for local use or initial setup. Many older monitors used DVI instead of HDMI. Luckily, connecting a DVI display to a Raspberry Pi is nearly as simple using a cheap HDMI to DVI adapter cable. These adapters convert the signals from the Pi’s HDMI output to DVI, allowing connection to a monitor designed for DVI input.
There are also options like the DSI port for official displays, composite ports for analog connections, and GPIO pins for custom setups. If you are looking forward to connecting your Raspberry Pi to a display monitor or you are just starting, these options provide flexibility. However, for remote monitoring, these physical connections become largely unnecessary once your remote access is configured.
Four Interesting Trends in Raspberry Pi Remote Monitoring
The landscape of remote access for single-board computers like the Raspberry Pi is constantly evolving. Here are four interesting trends shaping how we monitor and interact with these devices:
- Increased Adoption of Cloud-Based IoT Platforms: Services like RemoteIoT are part of a broader trend where users leverage cloud infrastructure to simplify complex networking challenges. These platforms abstract away the need for manual port forwarding and dynamic DNS, making remote access more accessible to a wider audience, especially for IoT deployments.
- Growing Emphasis on Secure Remote Access: With increasing cyber threats, there's a strong push towards more secure remote access methods. This includes widespread adoption of VPNs for encrypted tunnels, mandatory use of SSH keys instead of just passwords, and two-factor authentication for remote portals. The goal is to ensure that while access is convenient, it remains impenetrable to unauthorized entities.
- Raspberry Pi as a Versatile Home Server/IoT Hub: The Raspberry Pi's affordability and versatility have cemented its role as a popular choice for home servers, automation hubs, and various IoT projects. This increased deployment naturally drives the demand for robust and reliable remote monitoring solutions, as these devices often operate headless and need to be managed from anywhere.
- Integration with Smart Home Ecosystems and Automation: Many Raspberry Pi projects are now integrated into larger smart home ecosystems, controlling lights, sensors, or security cameras. This integration necessitates always-on, reliable remote access for monitoring device status, troubleshooting, and performing updates, often via mobile apps that connect back to the Pi.
Conclusion
Accessing and monitoring your Raspberry Pi from your Mac, even when it's behind a firewall, is not only possible but also increasingly straightforward with the right tools and knowledge. Whether you opt for the simplicity of a cloud-based service like RemoteIoT, or prefer the robust control offered by a VPN combined with VNC or XRDP, you have powerful options at your disposal.
We've discussed the importance of understanding firewall basics, walked through practical setup steps for various remote access methods, and touched upon crucial aspects like managing dynamic IP addresses. By embracing these strategies, you can maintain full control over your Raspberry Pi projects, no matter where you are. The ultimate guide to secure connections on the go is within your reach, enabling you to create a secure and efficient Raspberry Pi setup tailored to your needs.
How to use Raspberry Pi as a Wireless Router with Firewall – RaspberryTips
How to use a VGA Monitor with Raspberry PI - YouTube
How to use Raspberry Pi as a Wireless Router with Firewall – RaspberryTips
