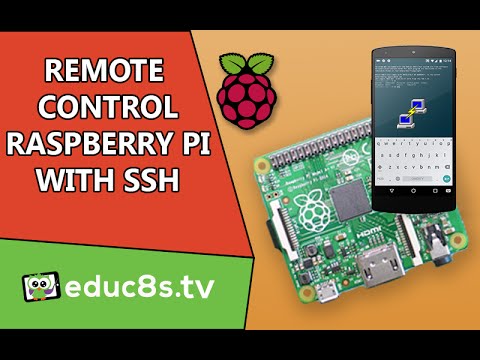
Mastering Remote Access: How To SSH Into Your Raspberry Pi From Anywhere
The Raspberry Pi, a tiny yet powerful single-board computer, has revolutionized the world of DIY electronics, home automation, and educational computing. Its versatility allows it to serve as anything from a media center to a robust home server. However, to truly unlock its potential, especially when it's tucked away in a corner or a remote location, you need a way to control it without being physically present. This is where SSH (Secure Shell) comes in, offering a secure and efficient method to manage your Raspberry Pi from virtually anywhere in the world.
Whether you're setting up a smart home hub, deploying an IoT device, or simply tinkering with a personal project, mastering SSH can save you countless hours and immense effort. Imagine updating software, troubleshooting issues, or even launching new applications on your Pi without ever needing to connect a monitor, keyboard, or mouse. This guide will walk you through the essential steps to enable SSH on your Raspberry Pi and connect to it, first from your local network, and then from anywhere across the internet.
Why SSH into Your Raspberry Pi?
So, why exactly would you want to SSH into your Raspberry Pi? The reasons are numerous and compelling:
- Remote Management: The primary benefit is the ability to manage your Pi without needing to be physically present. This is incredibly useful if your Pi is set up in a remote location, perhaps as a weather station in your garden, a security camera system, or a server in a closet. You can access its terminal, run commands, and perform administrative tasks as if you were sitting right in front of it.
- Headless Operation: Many Raspberry Pi projects are designed to run "headless," meaning without a connected display. SSH is the go-to method for interacting with these setups, allowing you to configure, monitor, and control them entirely through a command-line interface.
- Secure Access: SSH provides a secure, encrypted channel for communication between your computer and the Raspberry Pi. This means your login credentials and any data exchanged are protected from eavesdropping, making it a safe choice for remote administration.
- Automation and Scripting: For advanced users, SSH allows for easy integration with scripts and automation tools. You can write scripts on your main computer to automatically connect to your Pi and execute commands, streamlining repetitive tasks.
- Saving Time and Effort: Ultimately, mastering SSH saves you tons of time and effort. Instead of constantly plugging and unplugging peripherals or physically moving your Pi, you can manage it all from the comfort of your desk, or indeed, from anywhere with an internet connection.
To fully leverage the remote management features on your Raspberry Pi, enabling the SSH service is absolutely essential. This method provides secure access to a terminal session, allowing you to manage your device whether it's for personal projects or smart home setups.
Enabling SSH on Your Raspberry Pi
By default, SSH is disabled on Raspberry Pi OS for security reasons. This is a sensible default, as it prevents unauthorized access to your device. However, to use it, you'll need to explicitly enable it. Here are the main ways to do so:
Security First: Why SSH is Disabled by Default
The Raspberry Pi Foundation disables SSH by default to enhance security. If SSH were enabled out-of-the-box with default credentials, it would create a significant security vulnerability, making devices susceptible to brute-force attacks and unauthorized access. By requiring users to manually enable it, it ensures that you are aware of the implications and can take necessary precautions, such as changing default passwords and using SSH keys.
How to Activate SSH
The method you choose to enable SSH depends on whether you have physical access to your Raspberry Pi and whether you're running the desktop version of Raspberry Pi OS or the Lite (headless) version.
Method 1: Via Raspberry Pi OS Desktop (Physical Access)
If you have a display, keyboard, and mouse connected to your Raspberry Pi, enabling SSH is straightforward:
- Boot up your Raspberry Pi with Raspberry Pi OS Desktop.
- Click on the Raspberry Pi icon in the top-left corner to open the menu.
- Navigate to `Preferences` > `Raspberry Pi Configuration`.
- In the configuration tool, click on the "Interfaces" tab.
- Find the "SSH" option and select "Enabled".
- Click "OK" to save your changes.
- SSH will now be active on your Raspberry Pi.
Method 2: Via Raspberry Pi OS Lite (Headless Setup)
For headless setups, where you don't have a display connected, you can enable SSH either during the SD card flashing process or after the first boot using `raspi-config`.
During SD Card Flashing:
When flashing your SD card with Raspberry Pi Imager, you can apply advanced options:
- Open Raspberry Pi Imager.
- Choose your Raspberry Pi OS (Lite recommended for headless).
- Before writing, click the gear icon (or `Ctrl+Shift+X` on Windows/Linux, `Cmd+Shift+X` on macOS) to access "Advanced options".
- Here, you can enable SSH, set a hostname, and configure Wi-Fi credentials.
- Save these settings and proceed with flashing the SD card.
After First Boot (using `raspi-config`):
If you didn't enable SSH during flashing, or if you're using an existing installation, you can do it via the command line:
- Connect to your Raspberry Pi (e.g., via a directly connected keyboard/monitor, or if you can access it via a local network method like VNC or another SSH connection if it was already enabled).
- Open a terminal window.
- Type `sudo raspi-config` and press Enter.
- Use the arrow keys to navigate to `Interface Options`.
- Select `SSH` and press Enter.
- Choose `Yes` to enable the SSH server.
- Select `Finish` and reboot your Pi if prompted.
Connecting to Your Raspberry Pi on a Local Network
Once SSH is enabled on your Raspberry Pi, the next step is to connect to it from another machine on your local network. This typically involves knowing your Pi's IP address and using the `ssh` command.
Finding Your Raspberry Pi's IP Address
Any device connected to a local area network is assigned an IP address. In order to connect to your Raspberry Pi from another machine using SSH, you need to know the Raspberry Pi’s IP address. This is easy if you have a display connected, and there are a number of methods for finding it remotely from another machine on the network.
- On the Raspberry Pi itself (if you have a display):
Open a terminal on your Raspberry Pi and type `ifconfig` or `ip a`. Look for the `inet` address under the `wlan0` (for Wi-Fi) or `eth0` (for Ethernet) interface. It will typically look something like `192.168.1.100`.
pi@raspberrypi:~ $ ip a ... 2: eth0: - From another machine on the network:
You can use network scanning tools like `nmap` (on Linux/macOS) or Fing (mobile app), or simply check your router's administration page for a list of connected devices and their assigned IP addresses. Look for a device named "raspberrypi" or similar.
- Using Hostname (if mDNS is working):
Alternatively, if mDNS (Multicast DNS) is working on your network, you can often use the hostname instead of the IP address. By default, Raspberry Pis are often discoverable as `raspberrypi.local` (or whatever hostname you set followed by `.local`).
Initiating the SSH Connection
Connecting to your Raspberry Pi via SSH from Linux or macOS is straightforward using the built-in terminal. For Windows users, you can use PowerShell or the Command Prompt (Windows 10 and later have a built-in SSH client), or a third-party client like PuTTY for older versions.
To connect to your Raspberry Pi using SSH, follow these steps:
- Open a terminal window on your computer.
- On Linux/macOS: Open the "Terminal" application.
- On Windows: Open "PowerShell" or "Command Prompt".
- Enter the following command to SSH into your Raspberry Pi:
ssh pi@<YOUR_PI_IP_ADDRESS>Replace `<YOUR_PI_IP_ADDRESS>` with the actual IP address you found (e.g., `ssh pi@192.168.1.100`). Alternatively, if mDNS is working, you can use the hostname: `ssh pi@raspberrypi.local`.
- First-time connection prompt:
When prompted about the authenticity of the host (this happens only on the first connection from a new client), type `yes` and press Enter to confirm. This adds the Pi's host key to your known hosts file, preventing future warnings unless the Pi's key changes.
- Enter your Raspberry Pi's credentials:
You will then be prompted to enter your password for the `pi` user (or whatever username you are using). The default password is `raspberry` unless you changed it during setup (which is highly recommended).
pi@192.168.1.100's password: - Successful Connection:
After successful authentication, you will be placed in the shell prompt of your Raspberry Pi, indicated by a prompt like `pi@raspberrypi:~ $`. You are now remotely connected and can execute commands on your Pi!
Linux raspberrypi 5.10.63-v7l+ #1496 SMP Wed Dec 1 15:58:56 GMT 2021 armv7l The programs included with the Debian GNU/Linux system are free software; the exact distribution terms for each program are described in the individual files in /usr/share/doc/*/copyright. Debian GNU/Linux comes with ABSOLUTELY NO WARRANTY, to the extent permitted by applicable law. Last login: Mon Jan 1 10:00:00 2024 from 192.168.1.50 pi@raspberrypi:~ $You can click the terminal icon next to your device to get into the SSH shell of your Raspberry Pi, though this usually refers to a specific web interface or tool, the underlying mechanism is the same.
SSHing into Your Raspberry Pi from Anywhere (External Access)
Connecting to your Raspberry Pi from anywhere in the world means connecting from outside your local network. This is a more advanced setup and requires careful network configuration. The core idea is to make your Raspberry Pi accessible via your home's public IP address.
Understanding External Access
When you're on your local network, your Pi has a private IP address (e.g., `192.168.1.100`). When you connect from outside your home, you're using your home's public IP address, which is assigned by your Internet Service Provider (ISP). Your router acts as a gateway, translating between your private network and the public internet. To allow external connections to your Pi, you need to tell your router to forward incoming SSH requests to your Pi's private IP address.
Method 1: Port Forwarding (The Traditional Way)
Port forwarding involves configuring your router to direct traffic from a specific port on your public IP address to a specific port and IP address on your local network (your Raspberry Pi). This is the most common method for external SSH access.
- Find your Public IP Address:
Simply search "What is my IP" on Google, and it will display your public IP address.
- Set a Static IP for your Raspberry Pi:
It's crucial to assign a static IP address to your Raspberry Pi on your local network. If your Pi's IP changes, your port forwarding rule will break. You can do this in your router's DHCP settings or directly on the Raspberry Pi.
- Configure Port Forwarding on Your Router:
Log in to your router's administration interface (usually via a web browser, e.g., `192.168.1.1` or `192.168.0.1`). Look for sections like "Port Forwarding," "NAT," or "Virtual Servers."
- External Port: Choose a port number for external access. For security, it's highly recommended NOT to use the default SSH port (22). Pick a high, unused port, e.g., `2222`, `22022`, or any other non-standard port.
- Internal Port: This should be the standard SSH port, `22`.
- Internal IP Address: Enter your Raspberry Pi's static local IP address (e.g., `192.168.1.100`).
- Protocol: Select `TCP`.
Save the settings on your router.
- Connect from Anywhere:
Now, from any internet-connected computer, you can connect using your external IP and the port you forwarded:
ssh -p <EXTERNAL_PORT> pi@<YOUR_PUBLIC_IP_ADDRESS>For example: `ssh -p 2222 pi@203.0.113.45` (replace with your actual public IP and chosen port).
Security Warning: Opening ports on your router can expose your network to potential threats. Always use strong, unique passwords for your Raspberry Pi, consider implementing SSH key-based authentication, and keep your Raspberry Pi OS updated.
Method 2: VPN or Third-Party Services
If port forwarding seems too complex or poses security concerns, there are alternative methods to achieve remote access:
- Virtual Private Network (VPN): You can set up a VPN server on your home network (e.g., on your router or another Raspberry Pi). When you connect to your home VPN from anywhere, your remote device becomes part of your home network, allowing you to SSH into your Pi using its local IP address as if you were at home. This is generally the most secure method.
- Third-Party Remote Access Services: There are services designed to simplify remote access to devices behind NAT (Network Address Translation) routers without requiring manual port forwarding. These services often create a secure tunnel between your Pi and their cloud infrastructure, allowing you to connect through their platform. While the data provided mentions "To know more visit this blog article on raspberry pi remote access using socketxp," this highlights the existence of such solutions that abstract away the complexities of network configuration. These services typically involve installing a client on your Raspberry Pi that connects to their servers, making your Pi accessible via their platform. This guide will walk you through the steps to SSH into your Raspberry Pi from anywhere using a Windows machine, ensuring you have full control over your device no matter where you are, and these services can be particularly helpful for Windows users who might find network configuration daunting.
Final Summary
Connecting to your Raspberry Pi via SSH, whether locally or from anywhere in the world, is a fundamental skill that significantly enhances your ability to manage and utilize this versatile device. We've covered the crucial steps, from understanding why SSH is essential for remote management to enabling it securely on your Raspberry Pi OS. We then explored how to find your Pi's IP address and initiate a local SSH connection using simple terminal commands. Finally, we delved into the more advanced topic of external access, discussing port forwarding as a traditional method and introducing VPNs and third-party services as secure and often simpler alternatives. By mastering these techniques, you gain unparalleled flexibility and control over your Raspberry Pi projects, transforming your small computer into a truly remote-capable powerhouse.

How To Ssh Into A Raspberry Pi From Anywhere Using Windows In Your
How To Use Ssh Into Raspberry Pi From Anywhere On Windows A Complete
Raspberry Pi tutorial: Use SSH to in order to remote control your
