Unlock Your Raspberry Pi's Potential: A Comprehensive Guide To Secure Remote Access With Remote.it
Why Remote Access is a Game-Changer for Your Raspberry Pi
Imagine your Raspberry Pi serving as a personal cloud storage, a retro gaming console, or a home security system. Without remote access, managing these applications would require a physical keyboard, mouse, and monitor connected directly to the Pi. This isn't always practical, especially if your Pi is headless (without a display) or located in an inconvenient spot. Remote access solves this by allowing you to connect to your Raspberry Pi's desktop environment or command line directly from any browser or a dedicated application on another computer. This capability unlocks the full potential of your Pi, making it truly accessible from anywhere. Whether you're debugging a script, checking on your smart home devices, or simply want to access files, remote access provides the flexibility you need. A Raspberry Pi is indeed the perfect accessory for your TV setup, and remote access ensures you don't need to physically interact with it once it's configured.Getting Started: Initial Raspberry Pi Setup Essentials
Before diving into `remote.it`, it's crucial to ensure your Raspberry Pi has a solid foundational setup. If you're new to Raspberry Pi or Linux, don't worry – these steps are straightforward. The outline to getting setup is as follows:- Download a recent version of Raspberry Pi OS (formerly Raspbian): Always start with the latest stable release for the best compatibility and security.
- Write the Raspberry Pi OS image to an SD card: Use a tool like Raspberry Pi Imager or Balena Etcher to flash the OS onto a high-quality microSD card.
- Configure SSH on your Pi: SSH (Secure Shell) allows you to access your Pi's command line remotely. This is typically enabled during the imaging process or can be done by creating a file named `ssh` (no extension) in the boot directory of the SD card.
Deep Dive into VNC for Remote Desktop Access
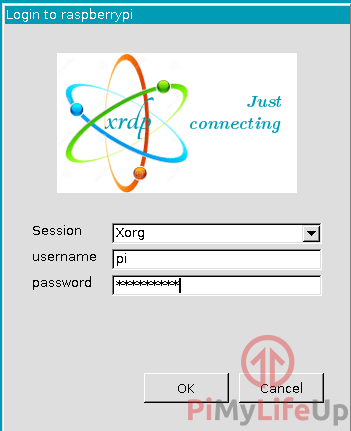
While SSH gives you command-line access, many users prefer a graphical desktop experience. This is where VNC (Virtual Network Computing) comes into play. VNC works by creating a remote screen which resembles the actual desktop of the Pi over the network, giving you a visual interface just as if you were sitting in front of it. To set up VNC on your Pi, you'll typically install the RealVNC software packages. This downloads both the VNC Server, which runs on your Pi, and a VNC Viewer, which you can install on your local computer to connect. The command to install RealVNC on your Pi is usually: `sudo apt install realvnc-vnc-server realvnc-vnc-viewer -y` Once installed, you can enable the VNC server via the Raspberry Pi Configuration tool, which can be accessed either from the desktop menu or via SSH. If you're using SSH, the Raspberry Pi Configuration tool will open in the terminal window of your SSH tool (e.g., Mobixterm). You'll typically scroll down to "Interface Options" and enable VNC. It's also worth noting that you can install RealVNC Viewer on your Raspberry Pi itself to access a remote desktop computer or another Raspberry Pi by entering the appropriate connection command. For those interested in alternatives, Raspberry Pi also supports remote desktop access using `xrdp` and clients like Remmina on Linux, offering another robust option for a graphical interface.Setting Up remote.it for Seamless and Secure Access
Now, let's get to the core of this guide: integrating `remote.it` for a truly secure and effortless remote access solution. `remote.it` stands out because it provides secure remote access to your Raspberry Pi OS, allowing you to connect to your Raspberry Pi desktop and command line directly from any browser, without the complexities of port forwarding or firewall configurations. Here's how to set up `remote.it` for your Raspberry Pi:- Register Your Raspberry Pi: First, you'll need to install the `remote.it` agent on your Raspberry Pi and register it with your `remote.it` account. The `remote.it` web portal should notify you that your Raspberry Pi has been registered.
- Automatic Service Detection: Once registered, `remote.it` is incredibly smart. It will automatically detect and set up `remote.it` SSH access and VNC if these services are enabled and running on your Raspberry Pi. This means if you've followed the steps above to configure SSH and VNC, `remote.it` will likely pick them up automatically.
- Adding Additional Services/Ports: If you have additional services or ports you would like to add (e.g., a web server running on port 80, a file server, or a custom application), simply click the '+' (add service) button on the device detail page within the `remote.it` web portal. You'll specify the internal port your service is running on.
- Verify Service Status: A crucial step is to always make sure that the service you're trying to access is actually running on your Raspberry Pi. `remote.it` provides the secure tunnel, but the underlying service (like SSH or VNC server) must be active on the Pi itself.
- Accessing Your Pi: This method typically requires the use of the `remote.it` desktop application or by initiating connections directly from the `remote.it` web portal. Once a connection is established, you can interact with your Pi's command line or desktop environment as if you were on the local network.
Troubleshooting and Advanced Tips
While `remote.it` simplifies much of the process, a few tips can enhance your experience: * Raspberry Pi Configuration Tool: If you ever need to adjust settings like VNC or SSH, the Raspberry Pi Configuration tool is your friend. As mentioned, it can be opened via SSH in your terminal window (e.g., Mobixterm). * USB Controller Settings: For Raspberry Pi 4 users, you might encounter specific settings related to USB. The USB controller built into the processor on Raspberry Pi computers sets the speed of the USB. On Raspberry Pi 4, this controller is disabled by default and is only connected to the USB Type-C power input connector. While usually not directly related to `remote.it` setup, being aware of such hardware specifics can be helpful for overall system optimization. * Community Resources: If you're looking to set up more advanced services, like a file server, there are many community resources available. For instance, some creators offer video tutorials for community members, providing access to dozens of lessons for Raspberry Pi along with many other benefits. Engaging with these communities can provide invaluable support and ideas for your projects.Final Thoughts
Setting up secure remote access for your Raspberry Pi is a fundamental step towards fully leveraging its capabilities. With solutions like `remote.it`, the process is streamlined, secure, and incredibly user-friendly. You gain the freedom to manage your Pi from anywhere, transforming it from a static device into a truly dynamic and accessible computing platform. Whether you're connecting to the command line for quick tweaks or accessing the full desktop environment for complex tasks, `remote.it` provides a robust and reliable bridge to your tiny powerhouse. Embrace the convenience and security, and unlock the full potential of your Raspberry Pi projects.
How to Setup Raspberry Pi Remote Desktop - Pi My Life Up
How to Setup Raspberry Pi Remote Desktop - Pi My Life Up

How to remote into your Raspberry Pi from a Windows PC - YouTube
