Unlock Your Raspberry Pi's Superpower: Remote Access With RemoteIoT VPC SSH
In today's interconnected world, the ability to manage devices remotely has transitioned from a niche skill to an essential requirement for tech enthusiasts and professionals alike. Among the most versatile and popular single-board computers, the Raspberry Pi stands out. But what if you need to access your Raspberry Pi, which is tucked away behind a firewall in your home or office, from anywhere in the world? This is where the powerful combination of RemoteIoT, Virtual Private Cloud (VPC), and Secure Shell (SSH) comes into play. It's like giving your Raspberry Pi a superpower, enabling seamless, secure remote access as if it were right on your local network.
This comprehensive guide will break down the complexities of setting up RemoteIoT VPC SSH on your Raspberry Pi, simplifying what might seem like fancy tech jargon into actionable steps. We'll explore why this setup is crucial, how it works, and walk you through the process of getting your Pi ready for remote management, ensuring robust protection mechanisms are in place.
What is RemoteIoT VPC SSH Raspberry Pi All About?
Let's demystify the terms that make up this powerful solution:
- Raspberry Pi: A tiny, affordable computer capable of doing almost anything a desktop PC can, but in a much smaller form factor. It's widely used for IoT projects, home automation, media centers, and countless other applications.
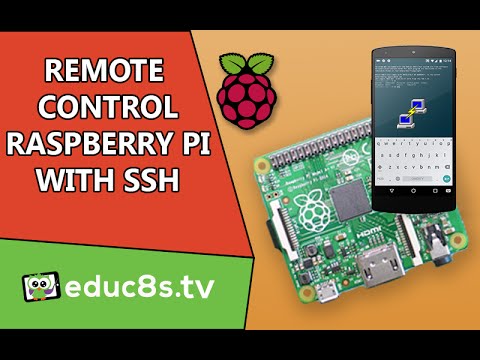
- SSH (Secure Shell): This is a cryptographic network protocol that allows secure remote login and command-line execution. It's the backbone of secure remote access for Linux-based systems like the Raspberry Pi, ensuring your connection is encrypted and authenticated.
- VPC (Virtual Private Cloud): While a full-fledged VPC typically refers to an isolated section of a public cloud (like AWS), in the context of RemoteIoT, it signifies a similar principle of creating a secure, private, and isolated virtual connection to your device. RemoteIoT leverages secure tunneling principles to achieve this, making your remote connection feel truly private and local.
- RemoteIoT: This is the orchestrating platform that makes the magic happen. It acts as a secure bridge, allowing you to connect to your Raspberry Pi securely, even if it's behind a restrictive firewall, without needing to discover its dynamic IP address or change any complex firewall settings on your end.
In essence, RemoteIoT VPC SSH on Raspberry Pi allows you to directly connect to your Raspberry Pi from anywhere, making it appear as if it's on your local network. All data exchanged, including commands and batch jobs, is wrapped with encrypted SSH, ensuring your communications remain private and secure.
Why Should You Care About RemoteIoT VPC SSH Raspberry Pi?
Understanding how to set up RemoteIoT VPC SSH on a Raspberry Pi has become an essential skill for tech enthusiasts and professionals alike. The benefits of mastering this setup are immense, especially in an era where remote connectivity is paramount:
- True Remote Access, Anywhere: Connect to your Raspberry Pi from any location in the world, whether you're across town or across the globe, without needing complex network configurations on your home router.
- Effortless Firewall Bypass: Say goodbye to the headaches of port forwarding, discovering the IoT device's IP address, or making risky changes to your firewall settings. RemoteIoT handles the secure connectivity, allowing your Pi to initiate an outbound connection that most firewalls permit.
- Enhanced Security by Design: All communications between your remote computer and your Raspberry Pi are encrypted using SSH, providing a robust protection mechanism against eavesdropping and unauthorized access. The use of SSH keys further strengthens this security, offering a superior alternative to password-based authentication.
- Centralized Management from a Web Portal: Send commands and batch jobs to your Raspberry Pi directly from a user-friendly web portal. This simplifies management tasks for individual devices or an entire fleet of IoT devices, making it incredibly efficient.
- Scalability for IoT Projects: For businesses and individuals embracing remote connectivity for IoT networks, this setup empowers confident management. You can deploy, monitor, and update numerous devices remotely, knowing robust protection mechanisms are maintained.
- Cost-Effective Solution: Leveraging your existing Raspberry Pi and a platform like RemoteIoT (which often offers free tiers or simplified access) can be a very economical solution for remote device management compared to more complex enterprise solutions.
- Versatile Practical Applications: From managing home automation systems to deploying edge computing solutions in AWS environments, the practical applications are vast. This setup unlocks the full potential of your Raspberry Pi for a wide range of projects.
How Does RemoteIoT VPC SSH Raspberry Pi Work?
The underlying mechanism of RemoteIoT VPC SSH is both clever and secure. Instead of you attempting to initiate a direct, inbound connection to your Raspberry Pi (which would typically be blocked by firewalls), your Raspberry Pi establishes an outbound, encrypted connection to the RemoteIoT platform. This outbound connection is generally allowed by most firewalls, as it's seen as legitimate traffic originating from inside the network.
The RemoteIoT platform then acts as a secure intermediary. When you want to connect to your Pi, you connect to the RemoteIoT platform. This platform then intelligently tunnels your SSH (or VNC) connection through the already established secure channel to your Raspberry Pi. This creates a virtual private connection, making it seem like you're directly connected to your Pi on a local network, even though you might be thousands of miles away.
This innovative method eliminates the traditional complexities associated with remote access, such as needing static IP addresses, configuring complex port forwarding rules on your router, or setting up a full-blown VPN, making secure remote access incredibly straightforward and accessible.
Getting Started: Setting Up Your Raspberry Pi
Before you can unlock this remote superpower, a few preparatory steps are necessary for your Raspberry Pi.
Prerequisites
Preparing for RemoteIoT VPC SSH Raspberry Pi setup requires ensuring you have the following:
- A Raspberry Pi: Any model will work, but a Raspberry Pi 4 or later is recommended for optimal performance, especially if you plan on running resource-intensive tasks or managing multiple connections.
- Raspberry Pi OS (formerly Raspbian): Ensure you have the latest version installed and updated on a high-quality SD card.
- Stable Power Supply: An appropriate power supply for your specific Raspberry Pi model to prevent power-related issues.
- Internet Connection: Your Raspberry Pi must have a stable internet connection (Wi-Fi or Ethernet).
- A Computer: You'll need a computer (Windows, macOS, or Linux) to access the RemoteIoT portal and to connect to your Raspberry Pi via an SSH client.
Enabling SSH on Raspberry Pi
By default, SSH is disabled on Raspberry Pi OS for security reasons. You'll need to enable it before you can connect remotely:
- Open the Terminal: On your Raspberry Pi, open a terminal window.
- Run Raspi-Config: Type
sudo raspi-configand press Enter. This will open the Raspberry Pi configuration tool. - Navigate to Interfacing Options: Use the arrow keys to navigate to "3 Interfacing Options" and press Enter.
- Enable SSH: Select "P2 SSH" from the options and choose "Yes" when prompted to enable the SSH server.
- Exit Raspi-Config: Select "Finish" and press Enter to exit the configuration tool.
- Reboot: Once done, it's crucial to reboot your Raspberry Pi to apply the changes. You can do this by typing
sudo rebootin the terminal.
Alternatively, for a headless setup, you can enable SSH by placing an empty file named ssh (with no file extension) in the boot partition of your SD card before booting the Raspberry Pi for the first time.
Securing Your Connection with SSH Keys
While password authentication for SSH is possible, SSH keys provide a significantly more secure and convenient way to authenticate your connection. It involves a pair of cryptographic keys: a public key (which you place on your Raspberry Pi) and a private key (which you keep secret and secure on your local machine). We highly recommend using SSH keys for enhanced security and a smoother login experience.
You'll typically generate these keys on your local machine using tools like ssh-keygen and then copy the public key to your Raspberry Pi's ~/.ssh/authorized_keys file. This process ensures that only your machine with the corresponding private key can authenticate, eliminating the risk of brute-force password attacks.
Connecting with the RemoteIoT Portal
Once your Raspberry Pi is prepared and SSH is enabled, the next crucial step is to integrate it with the RemoteIoT platform. This is where the magic of remote connectivity truly begins.
- Sign Up/Log In to RemoteIoT: Open the RemoteIoT portal in your web browser and log in to your dashboard. If you're a new user, you'll need to sign up for an account first.
- Add Your Raspberry Pi: Follow the intuitive instructions on the RemoteIoT dashboard to add your Raspberry Pi as a new device. This usually involves running a simple one-line script on your Raspberry Pi's terminal. This script securely registers your Pi with the RemoteIoT service, allowing it to establish the necessary outbound connection.
- Verify Device Connection: After running the script, you should almost immediately see your Raspberry Pi appear in the list of account devices on your RemoteIoT dashboard, indicating a successful connection.
- Initiate Connection: Click on your Raspberry Pi in the device list within the RemoteIoT dashboard. You'll then typically see options to connect to various ports (e.g., SSH, VNC, HTTP). Click "Connect Port" and select the SSH port (or VNC if you prefer a graphical interface).
- Get Connection Details: The RemoteIoT portal will instantly provide you with unique connection details: a specific hostname (e.g.,
proxy8.remoteiot.com) and a distinct port number (e.g.,10008). These details are dynamically generated for your secure tunnel. - Connect via SSH Client: Now, open your preferred SSH client on your local computer (e.g., PuTTY or MobaXterm on Windows, or the built-in Terminal on macOS/Linux). Use the hostname and port provided by RemoteIoT to establish your SSH connection. The command would typically look like:
ssh pi@proxy8.remoteiot.com -p 10008(remember to replacepiwith your Raspberry Pi's username, and the hostname/port with your specific details).
And just like that, you're connected! You can now send commands, transfer files, install software, and manage your Raspberry Pi as if it were directly connected to your computer, all without the hassle of changing firewall settings, configuring port forwarding, or constantly discovering its dynamic IP address.
Practical Applications and Examples
The power and versatility of RemoteIoT VPC SSH on Raspberry Pi extend to numerous practical applications across various domains:
- Home Automation Control: Remotely manage your smart home devices that are connected to or controlled by your Raspberry Pi. Adjust lights, thermostats, monitor security cameras, or even control your smart garden from anywhere in the world.
- IoT Device Management for Businesses: For developers and businesses, this setup is absolutely crucial for managing fleets of IoT devices deployed in diverse and often remote locations. It enables remote diagnostics, efficient software updates, firmware upgrades, and reliable data collection from edge devices without needing on-site visits.
- Edge Computing Deployments: Leverage the Raspberry Pi's capabilities for local data processing and analysis at the edge of your network. This setup allows you to deploy and manage edge applications remotely, ensuring continuous operation and data integrity before sending aggregated data to the cloud. An illustrative example showcasing RemoteIoT VPC SSH on Raspberry Pi highlights practical applications within AWS environments, demonstrating seamless integration for cloud-connected IoT solutions and hybrid cloud architectures.
- Remote Server and Project Management: Use your Raspberry Pi as a low-power, always-on server for personal projects, websites, or development environments, accessible securely from anywhere. This is perfect for hobbyists and students who want to continue working on their Raspberry Pi projects even when away from home.
- Remote Education and Development: Facilitate remote learning and collaborative development by providing secure access to Raspberry Pi labs or project setups for students and team members, fostering continuous learning and innovation.
Benefits at a Glance
To summarize the compelling advantages of embracing this powerful setup for your Raspberry Pi:
- Direct Connectivity: Connect to your Pi as if it's on your local network, simplifying interaction.
- Firewall Friendly: No complex firewall rules, port forwarding, or network configuration required.
- Secure by Design: All data is wrapped with encrypted SSH, providing robust protection.
- Web Portal Management: Easily send commands and batch jobs from a user-friendly dashboard.
- IP Discovery Eliminated: Forget about tracking dynamic IP addresses; RemoteIoT handles it.
- Robust Protection: Maintain high security standards for your individual Pi or entire IoT network.
- Optimal Performance: Especially beneficial with Raspberry Pi 4 or later for demanding tasks.
- Simplified Setup: Breaks down complex networking concepts into manageable, step-by-step instructions.
In conclusion, the combination of RemoteIoT VPC SSH

Mastering RemoteIoT VPC SSH Raspberry Pi: Free Download And Setup Guide
How To Set Up Iot Remote Ssh On Your Android Device For Free A Vpc
Raspberry Pi tutorial: Use SSH to in order to remote control your
