Unlock Remote Access: Raspberry Pi Secure Tunnels With Cloudflare And SSH
Your Raspberry Pi is a tiny powerhouse, capable of running everything from home automation to web servers. But what happens when you need to access it from outside your home network? The thought of exposing your home network to the internet can be daunting, often involving complex port forwarding rules and potential security risks. Thankfully, there's a secure and elegant solution: secure tunnels. Whether you're looking for a secure way to access your Raspberry Pi remotely without exposing your IP address or home network, or you want to host web services from your Pi, secure tunnels are your answer.
In this comprehensive guide, we'll dive deep into two primary methods for establishing secure tunnels to your Raspberry Pi: SSH tunnels and the increasingly popular Cloudflare Tunnel. We'll explore how these technologies work, why they're essential for remote access, and provide a high-level overview of their setup, ensuring you can access your Raspberry Pi projects from anywhere securely and reliably.
The Power of Remote Access & SSH Tunnels
Why Remote Access Your Raspberry Pi?
Imagine having a small server running in your closet, handling tasks like media streaming, smart home controls, or even a personal website. The convenience of accessing these services from anywhere in the world is immense. Remote access allows you to manage your Raspberry Pi, deploy updates, troubleshoot issues, or simply check on your projects without physically being next to the device. This capability transforms your Pi from a local gadget into a truly global resource.
Understanding SSH: Your Secure Handshake
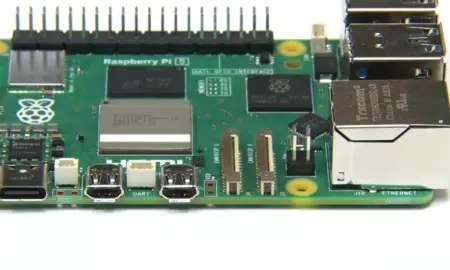
At the heart of secure remote access for Linux-based systems like the Raspberry Pi lies SSH, or Secure Shell. SSH is like a secret handshake that lets you control your Raspberry Pi from anywhere in the world. It provides a secure, encrypted channel over an unsecured network, ensuring that all communication between your client device and your Raspberry Pi remains private and protected from eavesdropping.
To begin setting up SSH on your Raspberry Pi, the first step is to install OpenSSH. OpenSSH is the most widely used SSH client and server software. To install OpenSSH on your Raspberry Pi, you can use the following command in the terminal:
sudo apt update sudo apt install openssh-server Once installed, SSH is typically enabled by default, allowing you to connect remotely using an SSH client from another computer.
What is an SSH Tunnel?
While basic SSH allows direct remote access, an SSH tunnel takes security and flexibility a step further. An SSH tunnel, also known as SSH port forwarding, creates an encrypted connection between two endpoints. Imagine a large tube connecting two endpoints – all traffic flowing through this tube is encrypted and secure. This is particularly useful when the Raspberry Pi is located in a private network behind a firewall or NAT, preventing direct access from the outside.
A secure reverse SSH tunnel is a cryptographic method that allows you to access your Raspberry Pi remotely, providing secure and encrypted communication between two networks. Let's say you want to access an SSH client behind a NAT router or firewall from a public SSH server. For this, you first need to create an SSH connection, also known as an SSH tunnel, from the SSH client (your Raspberry Pi) to the SSH server (a publicly accessible server). This "reverse" connection punches a hole through your firewall from the inside out, allowing you to then connect back into your Pi via the public server.
If you're worried about security, an SSH tunnel is your best friend. The Raspberry Pi SSH tunnel proxy is a powerful combination that offers users a secure and private way to browse the internet. This setup involves using a Raspberry Pi device as a middleman to route your internet traffic through an encrypted SSH tunnel. This method is incredibly versatile and can be used for various purposes, from securely accessing internal network services to creating a private browsing proxy. Concepts like `raspberrypi/reverse ssh` and `raspberrypi/ssh stunnel` are variations and enhancements of this core idea, providing even more robust and secure tunneling options.
Cloudflare Tunnel: A Modern & Easier Approach
Introducing Cloudflare Tunnel: Bypassing the Hassle
While SSH tunnels are powerful, they can sometimes be complex to set up, especially when dealing with dynamic IP addresses or managing multiple services. This is where Cloudflare Tunnel (formerly Argo Tunnel) shines. Cloudflare Tunnel provides a secure pathway to your Raspberry Pi without the need for port forwarding or exposing your IP address directly to the internet. It offers a more managed and often simpler solution for exposing web services or providing remote access to devices behind restrictive networks.
Cloudflare Tunnel is a secure and easy way to do it. It eliminates the need for inbound firewall rules or complex network configurations. This detailed guide will walk you through the complete setup process, allowing you to explore the seamless integration of Cloudflare Tunnel with your Raspberry Pi to secure and enhance your internet connectivity. Whether you're aiming to host web services or secure remote access, Cloudflare Tunnel offers a robust solution for accessing your device from anywhere securely.
How Cloudflare Tunnel Works Its Magic
Preparing your Raspberry Pi for the Cloudflare Tunnel involves installing a piece of software called "cloudflared." Cloudflared is the software that creates and maintains the secure tunnel between the Pi and the Cloudflare network. Instead of opening ports on your router, your Raspberry Pi initiates an outbound connection to Cloudflare's global network. Cloudflare then routes incoming requests for your domain directly to your Pi through this established tunnel.
The beauty of this approach is that secure tunneling does not require updates to your existing inbound firewall rules, so you can keep the same security level provided by firewall rules at a remote site. Your Pi never directly exposes its IP address or any open ports to the public internet, significantly reducing your attack surface.
Setting Up Cloudflare Tunnel on Your Raspberry Pi (Simplified Steps)
Setting up the Cloudflare Tunnel on the Raspberry Pi involves a few key steps, primarily revolving around the `cloudflared` daemon. While a full step-by-step tutorial is beyond the scope of this article, here's a high-level overview of the process:
- Install `cloudflared`: You'll download and install the `cloudflared` binary on your Raspberry Pi. This software is based on Debian, making it the perfect choice for 95% of projects due to its compatibility with the Raspberry Pi's underlying operating system.
- Authenticate `cloudflared`: You'll authenticate `cloudflared` with your Cloudflare account, typically by running a command that opens a browser window for login.
- Create a Tunnel in Cloudflare Dashboard: From the Cloudflare dashboard, navigate to "Networks" > "Tunnels" and click on "Add a Tunnel."
- Choose Connector Type: The first step of the tunnel setup wizard is to choose the type of the connector. Select "Cloudflared" and click "Next."
- Configure the Tunnel: You'll then define which services on your Raspberry Pi (e.g., SSH, a web server, a VNC server) you want to expose through the tunnel and map them to a public hostname.
- Run the Tunnel: Finally, you'll configure `cloudflared` to run as a service on your Raspberry Pi, ensuring the tunnel is persistent even after reboots.
This setup provides a robust and secure solution for accessing your device from anywhere securely, whether you're aiming to host web services or secure remote access.
Which Tunneling Method is Right for You?
SSH Tunnel vs. Cloudflare Tunnel: A Quick Comparison
Both SSH tunnels and Cloudflare Tunnel offer excellent solutions for secure remote access to your Raspberry Pi, but they cater to slightly different needs and preferences:
- SSH Tunnels:
- Pros: Highly flexible, ideal for direct remote shell access, can be used for simple port forwarding (local/remote), doesn't require third-party services for the tunnel itself (though a public SSH server is often needed for reverse tunnels).
- Cons: Can be more complex to set up and maintain, especially reverse tunnels through NAT/firewalls. Requires managing a public SSH server if you want to access from outside your network without port forwarding.
- Cloudflare Tunnel:
- Pros: Extremely easy to set up (no port forwarding!), hides your home IP address, leverages Cloudflare's global network for performance and DDoS protection, excellent for exposing web services or multiple internal services, managed solution.
- Cons: Relies on Cloudflare as a third-party service, primarily designed for HTTP/S traffic but can tunnel other protocols.
If your primary goal is to simply get a secure shell into your Pi from anywhere, and you're comfortable with manual configuration, an SSH tunnel is a solid choice. If you want to expose web services, prefer a managed solution, or want to avoid port forwarding entirely, Cloudflare Tunnel is often the more modern and convenient option.
Conclusion
Accessing your Raspberry Pi remotely doesn't have to be a security nightmare. By leveraging the power of secure tunnels, you can maintain full control over your device and its projects from anywhere in the world, all while keeping your home network safe and sound. Whether you opt for the robust and flexible SSH tunnel or the streamlined and powerful Cloudflare Tunnel, you're investing in a secure, encrypted pathway that bypasses the traditional headaches of network configuration and exposure.
Both methods offer compelling advantages, allowing you to choose the solution that best fits your technical comfort level and specific project requirements. So go ahead, set up your secure tunnel, and unlock the full potential of your Raspberry Pi, knowing that your remote access is both convenient and impenetrable.
How to Create Secure Reverse SSH Tunnel on Raspberry Pi? - ElectronicsHacks

How to Create Secure Reverse SSH Tunnel on Raspberry Pi? - ElectronicsHacks
PiTunnel - Access your Raspberry Pi projects from anywhere
